 |
| See what I mean? Creepy. |
"Why is that a problem?" you ask. Well, I own no sewing machine. I did what any intelligent individual would do and I consulted Google for the answer: no-sew curtains. As with my gluten-free red velvet cupcake recipe, I found no instruction sheet I liked by itself, so I combined the "easier" elements of two. (I believe one was on HGTV's site.)
VERY IMPORTANT NOTE: If you plan to make no-sew curtains, please do not use no-sew glue. It's crap in a bottle and not even adhesive crap. Go with the strips of hem tape. Otherwise, your no-sew curtains will turn into hand-sewn curtains if you have no sewing machine like yours truly.
Anyway, I bought fabric that I liked. You can cut up an inexpensive table cloth from Marshall's/Home Goods/wherever, but I found fabric that I really wanted at JoAnn's. Here's how I'd do it with the hem TAPE (not the stupid, craptastic glue).
Materials:
 |
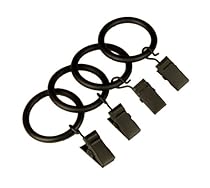
| Meet the curtain rings with clips. |
- Curtain rings with clips
- Hem tape (can be found in craft stores or craft sections)
- Iron
- Scissors
- Needle & thread (just in case)
- Curtain rod (obviously)
- measuring tape
- Jeff installed the curtain rod because he's tall, and that's what guys like to do.
- I measured the window (taking into account that I'd need to measure from wherever the curtains would start, which wasn't necessarily at the top of the opening)
- I measured one side of the fabric and cleaned up the ends by sewing them under (after having failed miserably at trying to use the no-sew glue). At this point, YOU, the smart person that you are, would be attaching the hem tape, sticky side down, to the back of the curtain and ironing the hem in place.
- Once I made one curtain, I measured out the other side, leaving enough room to tuck under and sew (again, you'd be ironing the sticky hem tape and saving yourself time) so that this side was exactly as big as the other side. I feared that I'd make both sides at once and one side would be smaller than the other, so I used the first one as a template for the second one.
- Once all of your untidy hems are neatly sewn (ahem, ironed in place), attach the rings with clips to the top of your curtains and hang them on your curtain rod. Tada!
 |
| I know that creepers can still be outside of my window, but if I can't see them, then they don't exist. |